2. Connecting to Jupyter
Overview
Questions
- How do we deploy and access a Jupyter notebook server using Koa?
Objectives
- Use Koa’s web interface to deploy a Jupyter notebook server job and connect to the server.
Creating a Jupyter notebook server
We will use Koa to deploy and access a Jupyter notebook with python scripts demonstrating the usage of the Tapis Streams API. The web interface for Koa includes a built-in interface for creating and deploying a Jupyter notebook server.
Note
If you are already familiar with an alternative method to deploy a Jupyter notebook, e.g. Google Colab, feel free to use that instead.
Deploying a Jupyter notebook server on Koa
Go to https://koa.its.hawaii.edu in a web browser and log in with your UH credentials. This will bring you to the Koa web interface.
At the top of this interface there should be a dropdown menu labeled “Interactive Apps”. Click that and select “Jupyter Notebook”. This will bring you to a form for configuring and deploying the server as a job on Koa.

We will deploy this job to the workshop partition. Most of the default settings for this job should work, but increase the “Number of hours” to 2. These values should be as follows:
| Field | Value |
|---|---|
| SLURM Account | (blank) |
| Partition | workshop |
| Number of hours | 2 |
| Number of Nodes | 1 |
| Number of Tasks per Node | 1 |
| Number of cores per task | 1 |
| GB of RAM | 6 |
| Number of GPUs requested | 0 |
| GPU Type | Any |
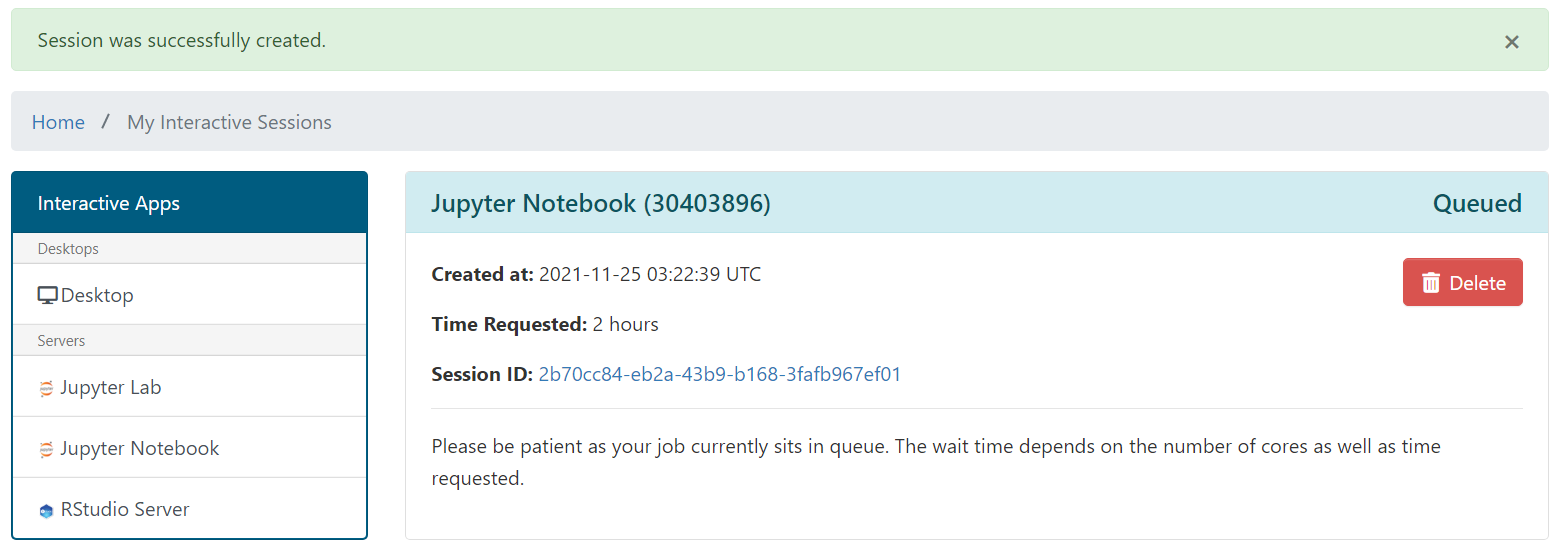
Click the “Launch” button to schedule the job. This should display a tile with information about the job including its status. The job will likely start with the “Queued” status indicating that it has been queued and is waiting for resources to become available to execute the job.
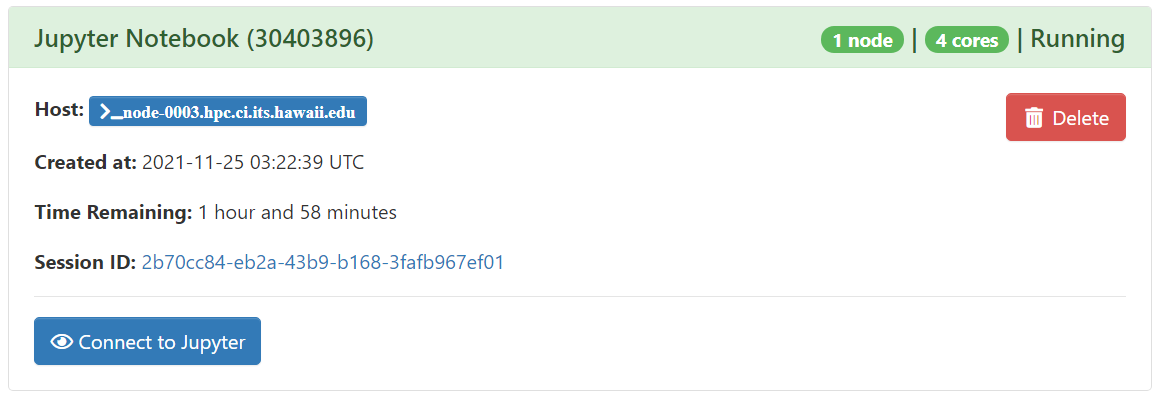
Shortly, the job status should change to “Running” indicating the job has been launched, and a “Connect to Jupyter” button should be available at the bottom of the tile. Clicking this will connect you to the deployed Jupyter notebook server.
The Jupyter notebook server will display the files available in your account’s home directory on Koa. We will need to download the notebook file for this workshop and install some dependencies the notebook relies on. The next section will describe how to install these dependencies and load the notebook.
Key Points
- Koa’s web interface provides a built-in function for deploying a Jupyter notebook server.
- After configuring and submitting a job to Koa for deploying the Jupyter notebook server, we can connect to the server and use it to access notebook files stored in the user’s home directory.